Tips and tricks
·
6 min
How to Add a Custom HTML Element to Your Campaign Template
This guide explains how to add a custom HTML element to your Glue Up campaign—enhancing your event marketing & membership communications.

Step 1: Click on the Highlight Area
Begin by clicking on the highlighted section in your campaign interface. This intuitive cue guides you directly to the editing tools provided by the Glue Up platform.

Step 2: Open Campaign Settings
Next, click on Campaign Settings… to access the configuration menu. This area allows you to adjust layout settings and integrate custom features—an essential step for Glue Up administrators looking to tailor their campaigns.
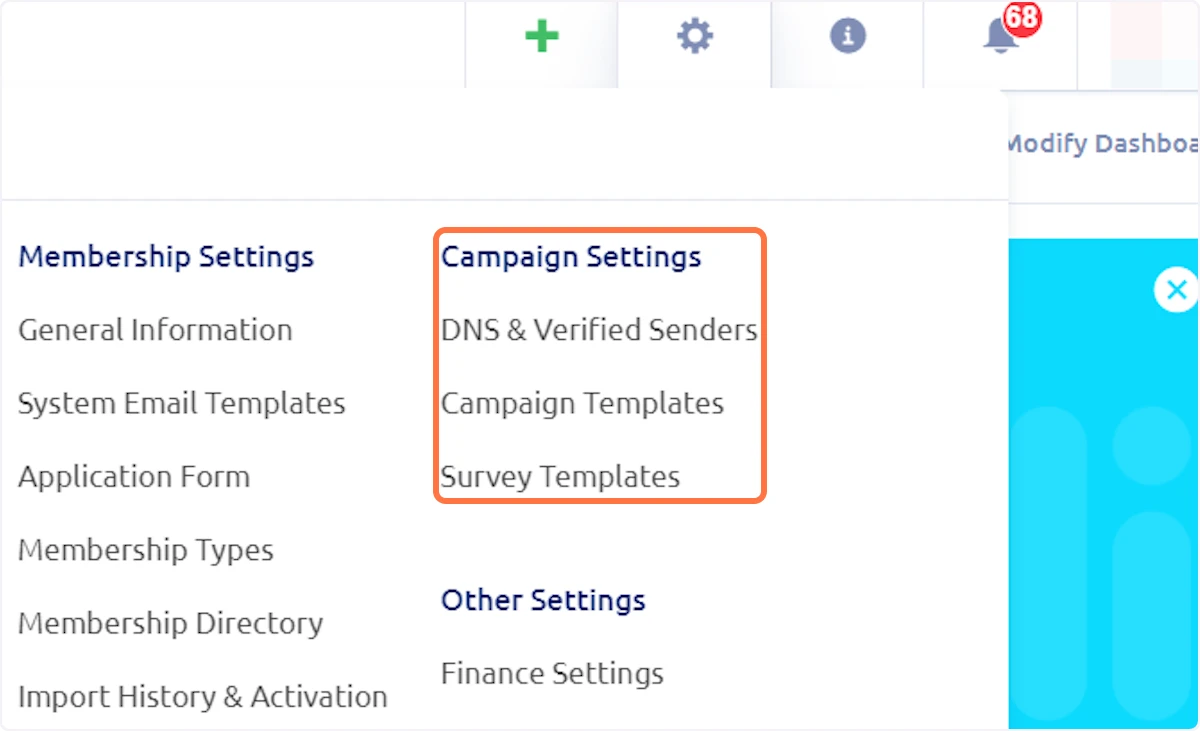
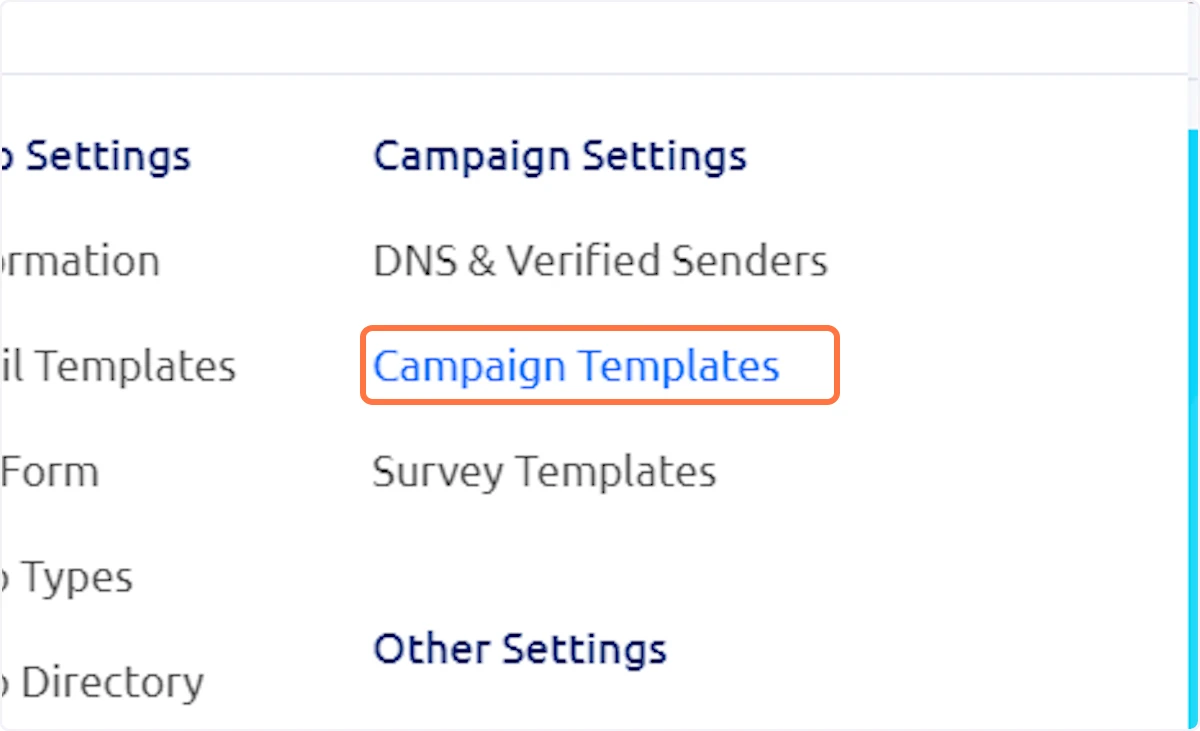
Step 3: Navigate to Campaign Templates
Within the settings menu, select Campaign Templates. This section is your command center for creating and modifying campaign designs on the Glue Up platform.
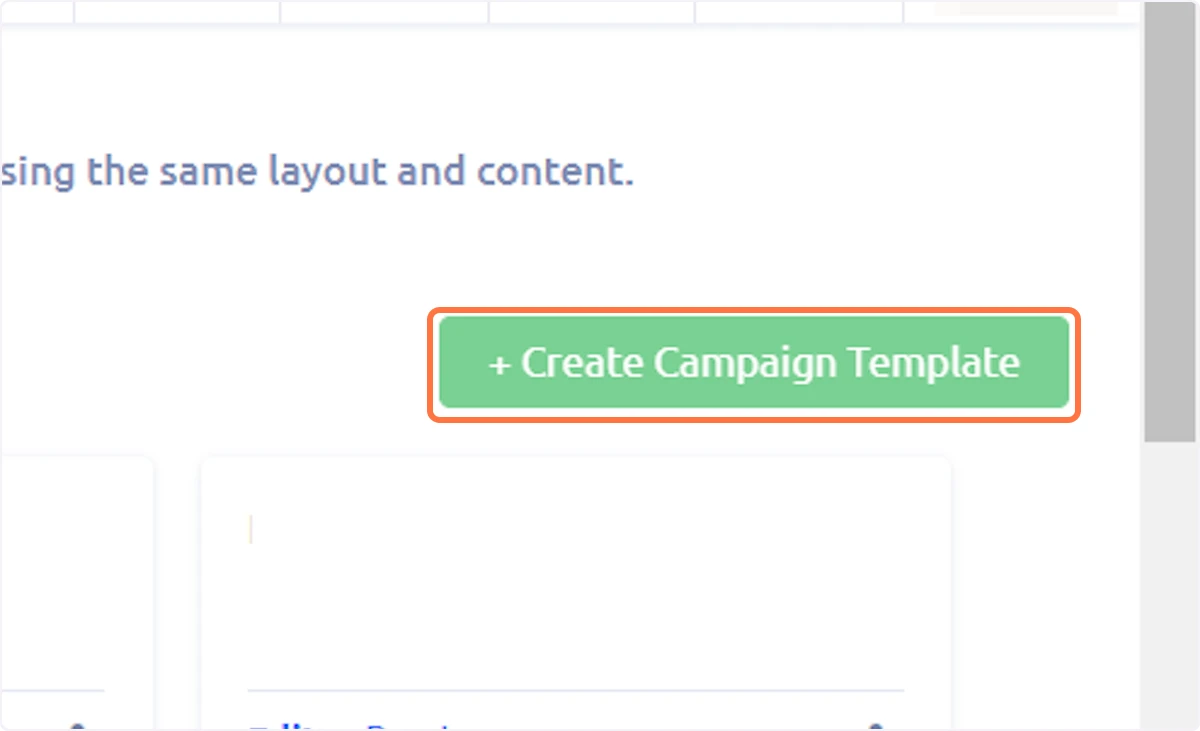
Step 4: Create a New Campaign Template
Click on + Create Campaign Template to begin a new template creation process. With our admin service handling your Glue Up platform, you can effortlessly launch new campaign designs that align with your organization’s goals.
Step 5: Name Your Template
Type "IPI test" as the template name. Using a clear, descriptive title aids in organization and improves searchability for admins seeking to customize their Glue Up campaigns.
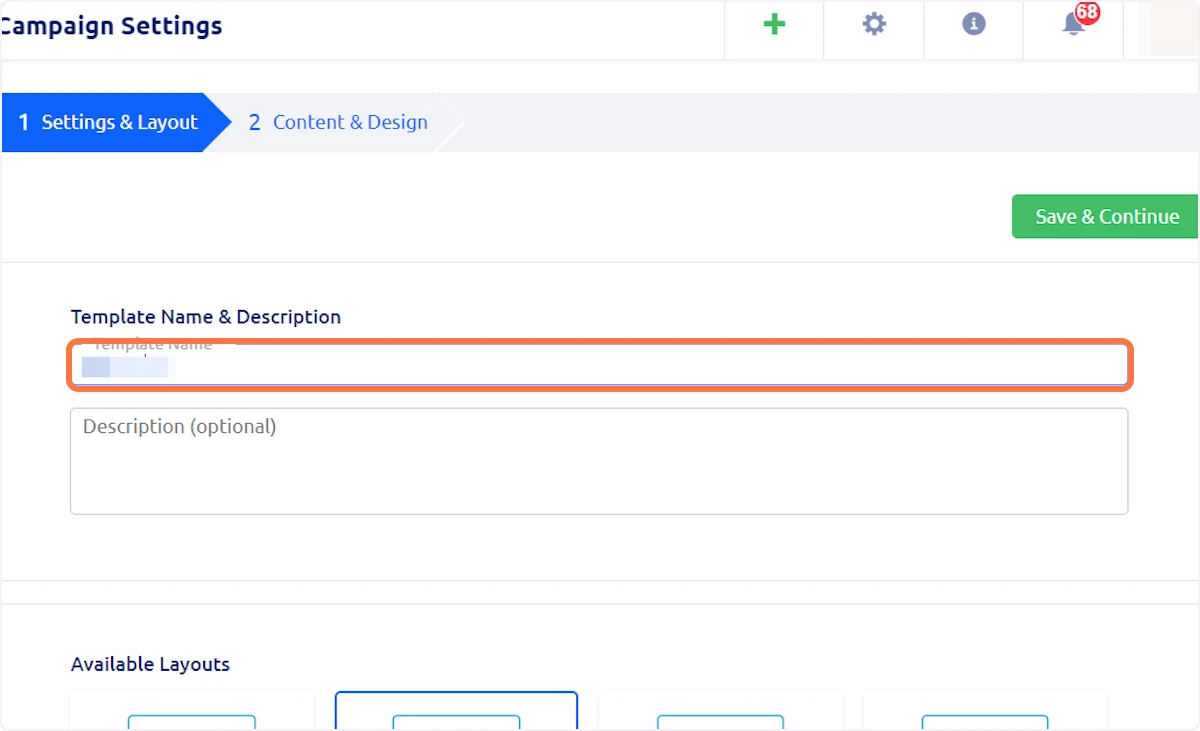
Step 6: Customize Template Name and Description
Click on Template Name & Description… to add additional details. A well-crafted title and description not only streamline your admin workflow but also provide essential context for future reference and platform optimization.

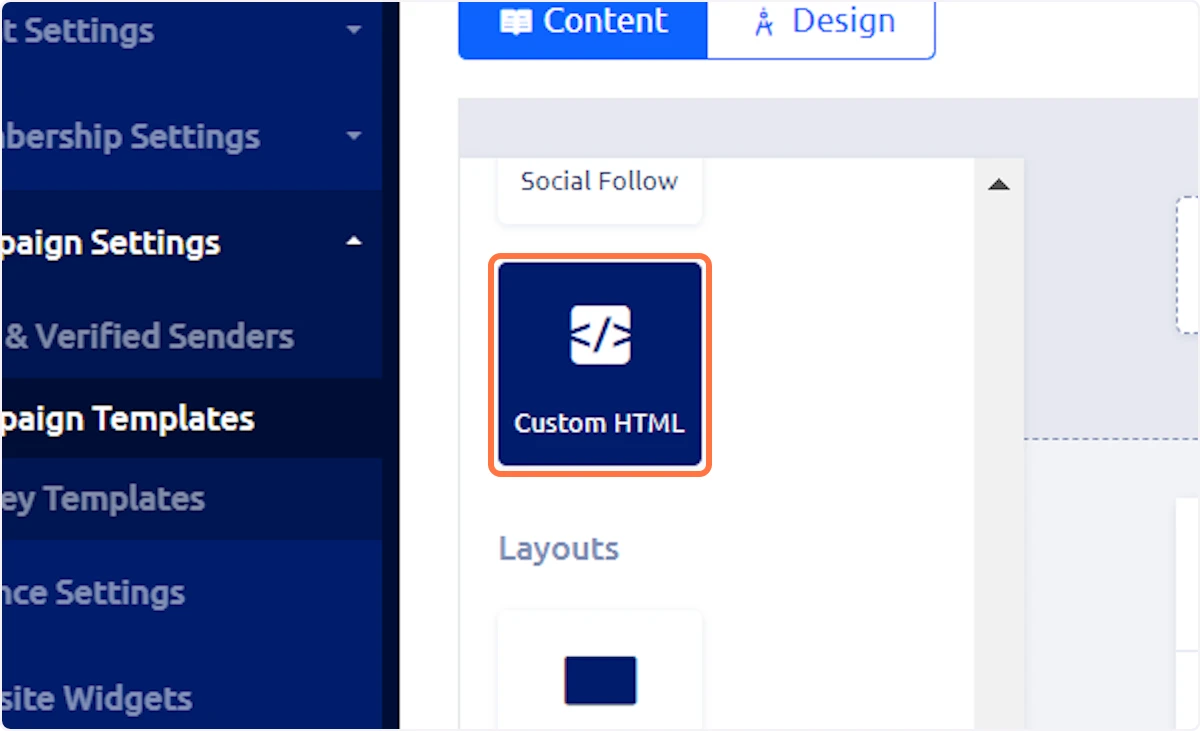
Step 7: Select Custom HTML in Content & Design
Within the Content & Design section, select Custom HTML. This feature empowers you to embed personalized HTML code—ideal for adding unique features that enhance your campaigns, whether you’re promoting events or engaging a membership base.
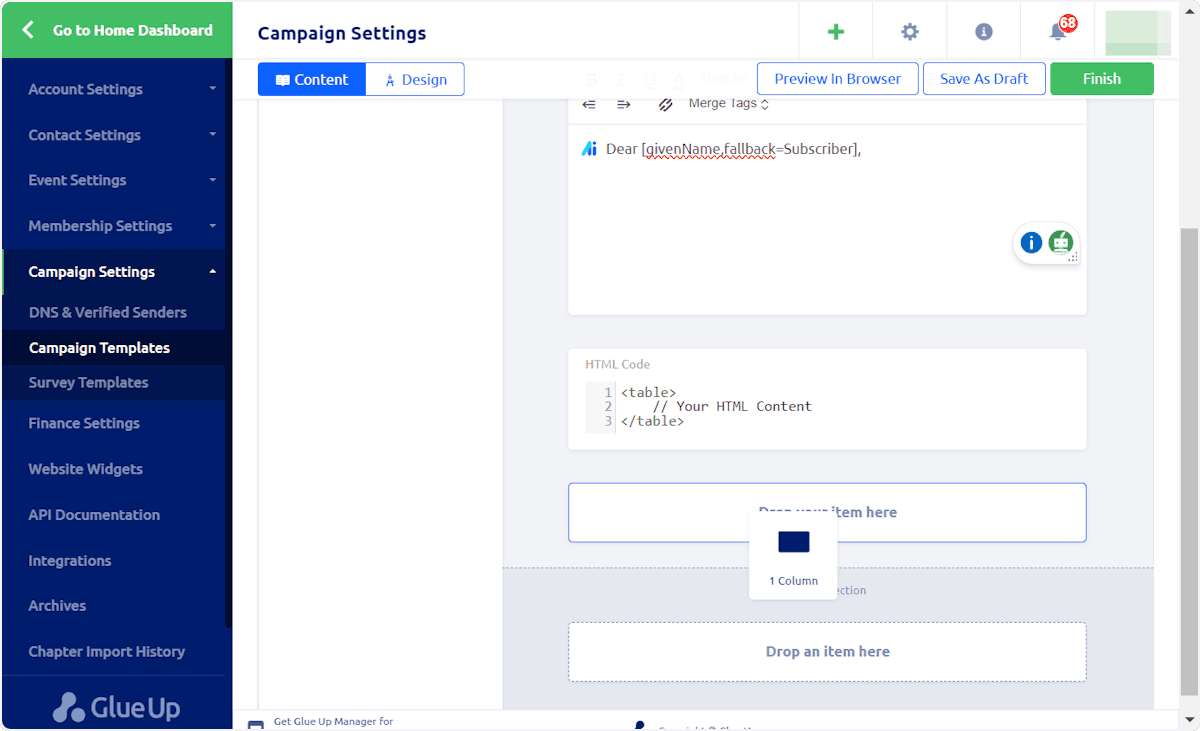
Step 8: Drag and Drop the HTML Element
Simply drag the HTML element into your campaign’s content area. Our drag-and-drop interface makes it easy to place elements exactly where you need them—perfect for designing campaigns that drive membership engagement and event sign-ups.
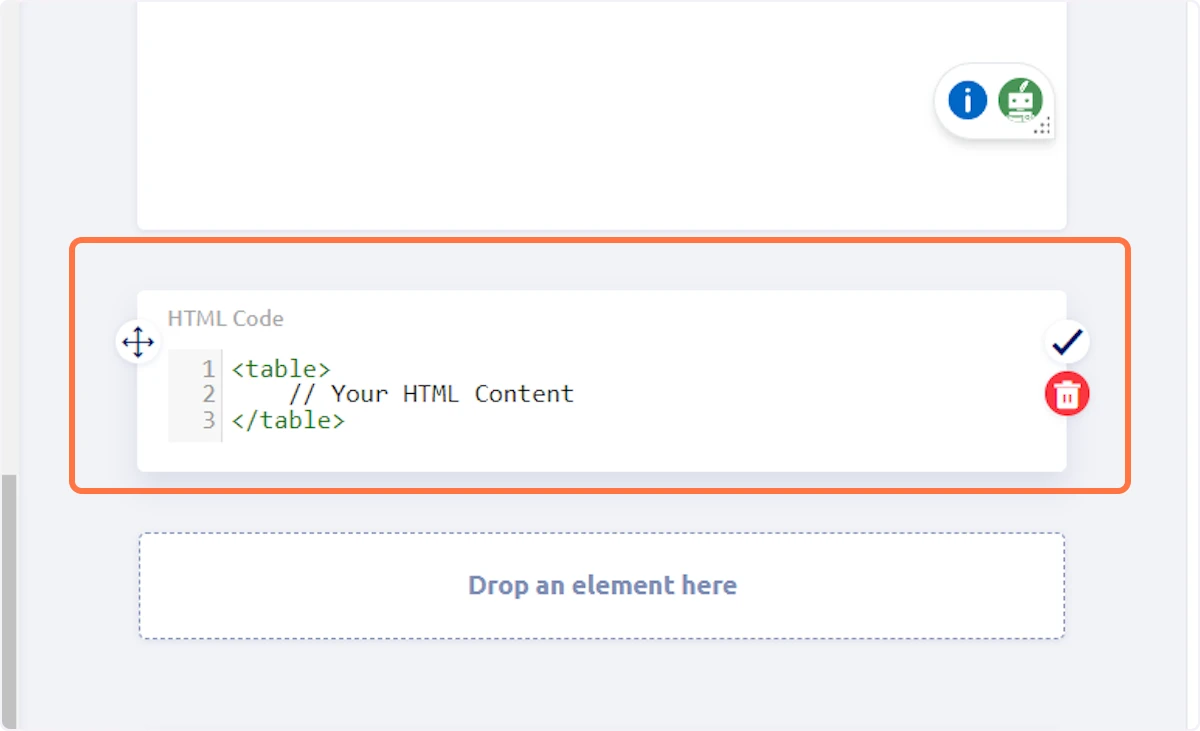
Step 9: Add Your Custom HTML Code
Finally, enter your custom HTML code into the editor. This step lets you incorporate dynamic elements—such as registration forms, interactive widgets, or custom styling—to enhance your campaign’s performance and user engagement. Whether you're promoting an event or updating your membership portal, this feature ensures you have the flexibility to stand out.
How Our Admin Service Supports Organizations
Our specialized admin service is designed to help you fully leverage the capabilities of the Glue Up platform. We handle routine administrative tasks—such as campaign template customization and HTML integration—allowing you to focus on strategic initiatives like member engagement, event planning, and streamlined communications.
Final Thoughts
By following these straightforward steps, you can effortlessly add a custom HTML element to your Glue Up campaign. Our admin service ensures that your platform remains optimized and user-friendly, helping you maintain a competitive edge in managing memberships and events.
For more tips on managing your Glue Up platform and maximizing campaign effectiveness, explore our latest resources