Tips and tricks
·
6 min
How to Create a Smart List in Glue Up
In this comprehensive guide, we’ll show you how to create a smart list in Glue Up, helping you streamline your contact management and improve your marketing strategy.

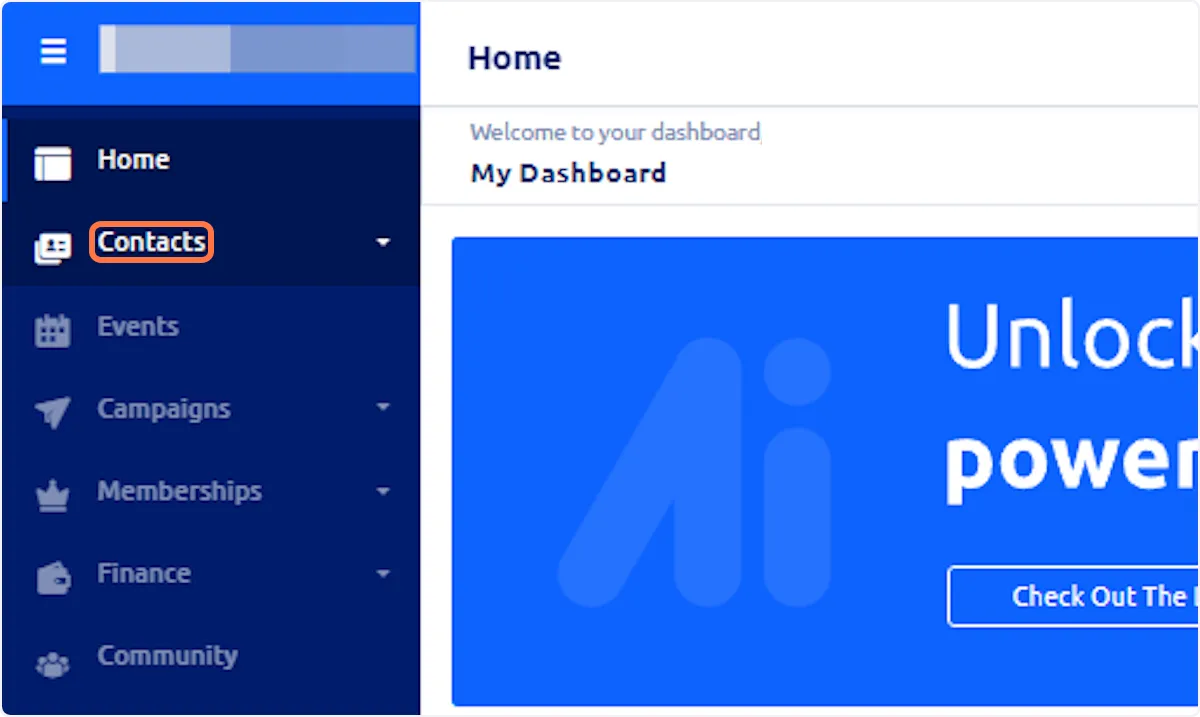
Step 1: Access the Contacts Section
Begin by navigating to the Contacts section in your Glue Up dashboard. This is the starting point for creating your smart list and managing your contacts effectively.
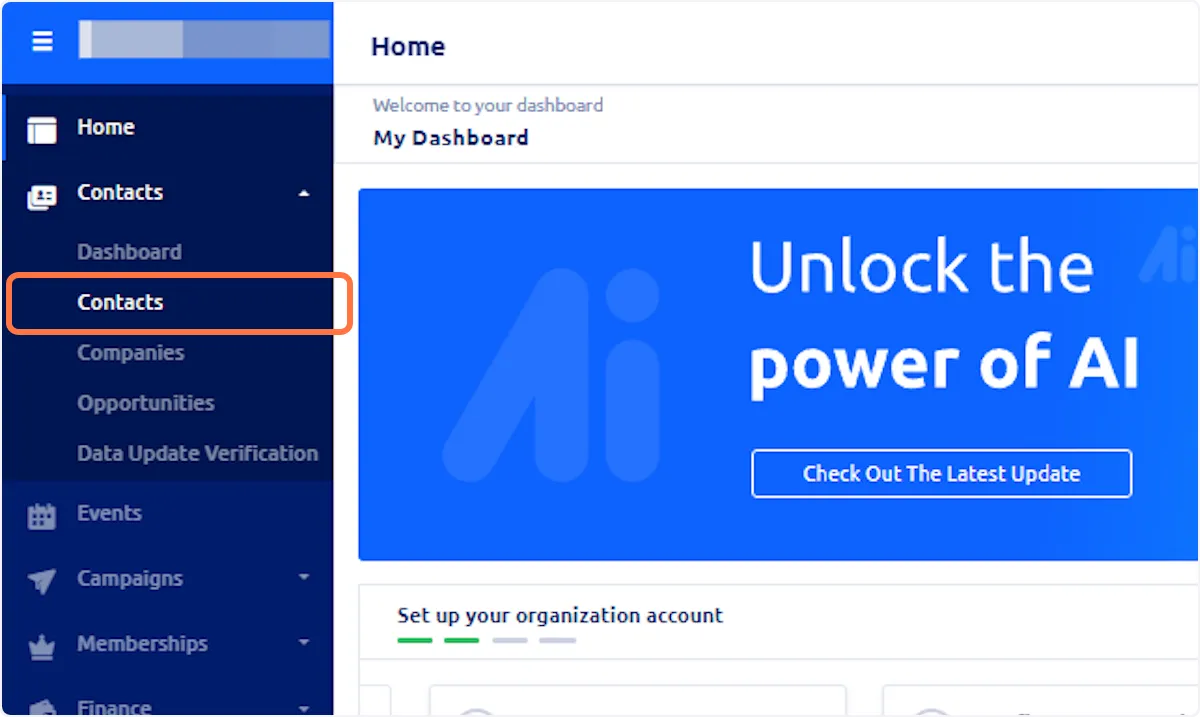
Step 2: Open the Contacts Menu Again
Click on Contacts again (as required by Glue Up’s interface) to confirm that you are in the correct view for managing your entire contact list. This step ensures you have full access to all your contacts before creating your smart list.
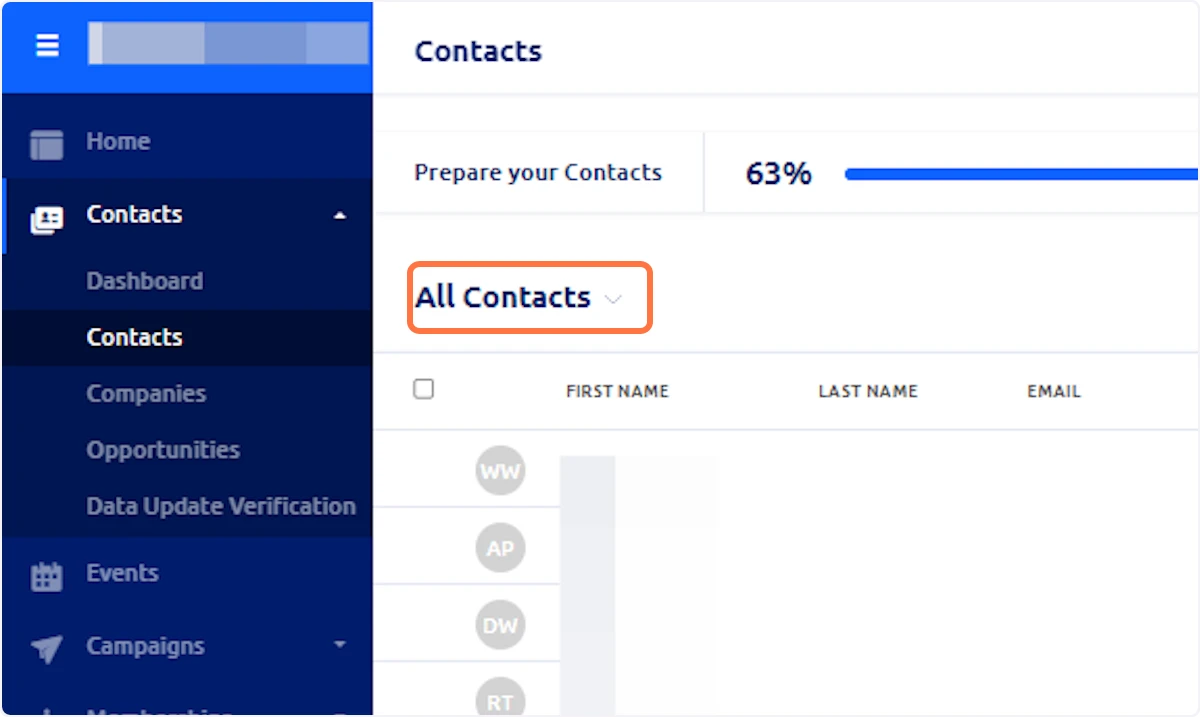
Step 3: View All Contacts
Select All Contacts to display the complete list of contacts on your Glue Up platform. This view helps you verify the available data before filtering it into a smart list.
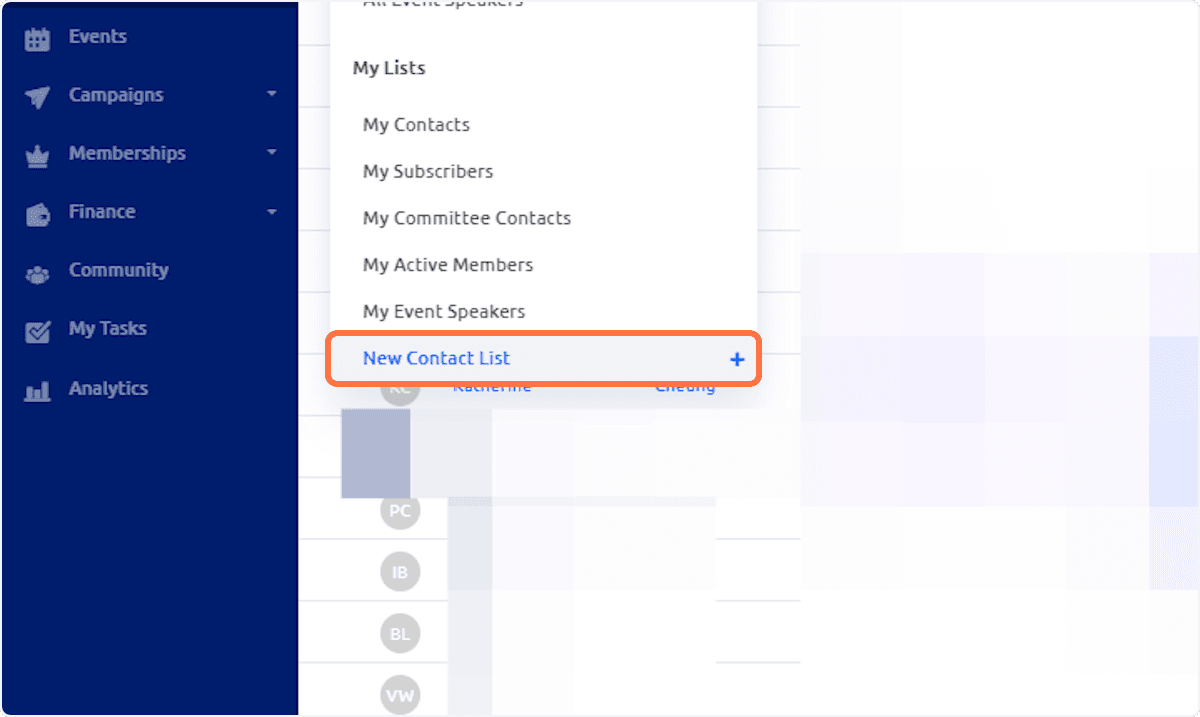
Step 4: Create a New Contact List
Click on the New Contact List button to start creating your smart list. This is where you’ll define the criteria and naming for your list.
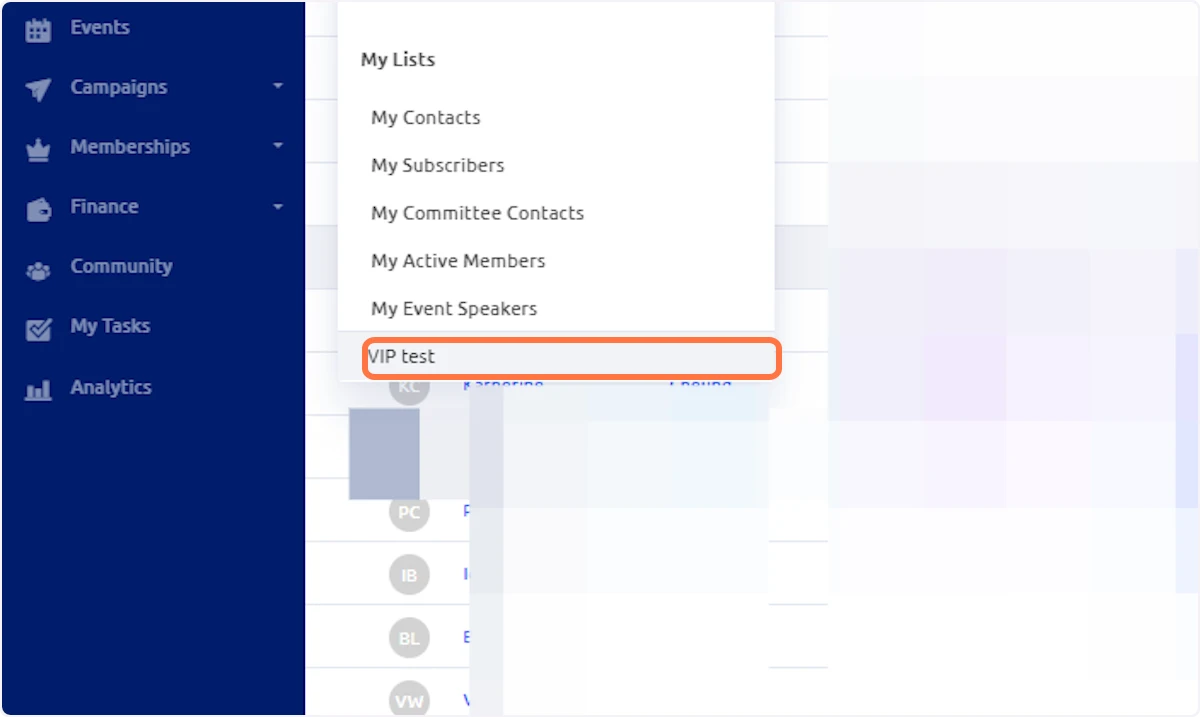
Step 5: Name Your Smart List
Type in a descriptive name for your smart list. For example, enter "VIP test" to indicate that this list targets a specific segment of your contacts.
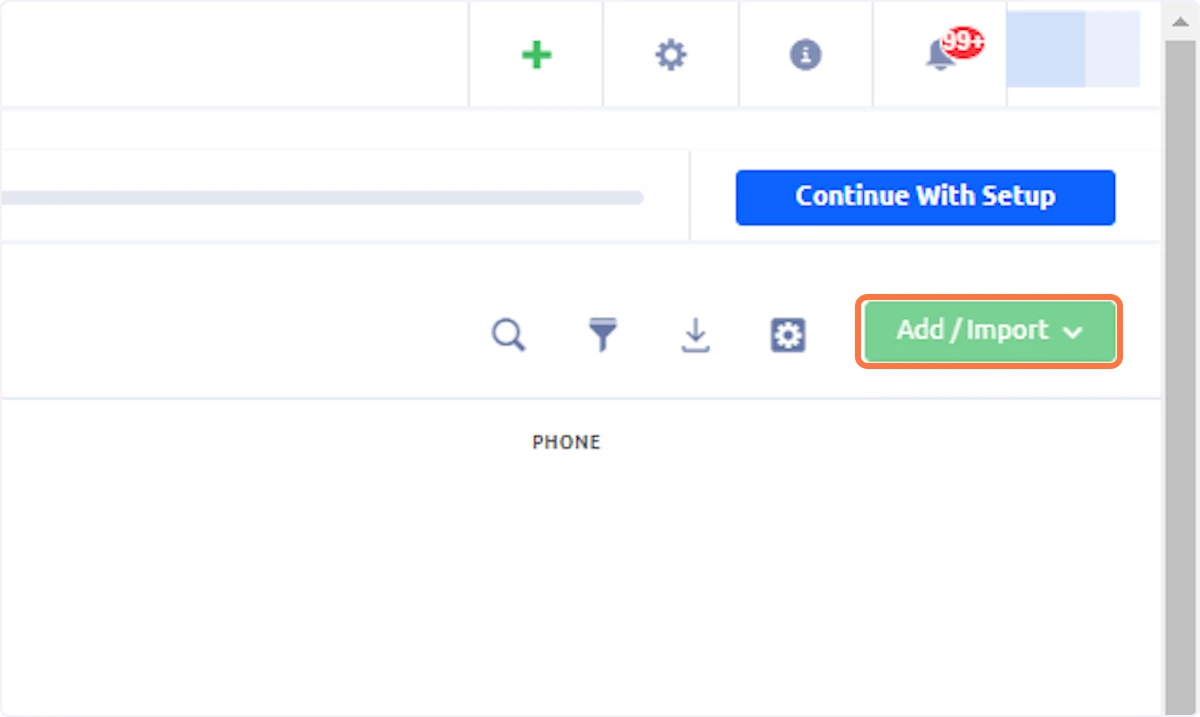
Step 6: Begin the Import Process
Click on the Add / Import … option to start importing the contacts that will populate your smart list. This step integrates your existing contact data with your new smart list criteria.
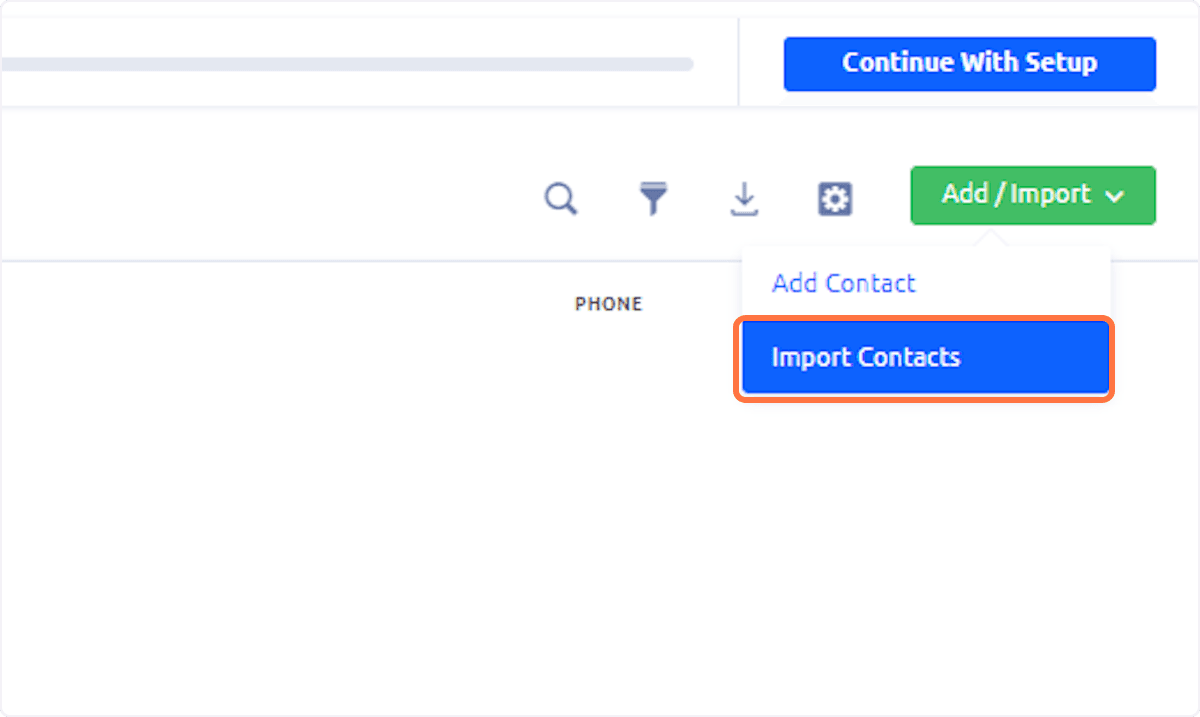
Step 7: Import Contacts into Your Smart List
Finally, click on Import Contacts to complete the process. This action creates your smart list based on the criteria and data you have defined, making it easier for you to target and manage specific contact groups on Glue Up.
How Squareloom Supports Your Glue Up Experience
At Squareloom, our mission is to simplify your administrative tasks on the Glue Up platform. Our expert team assists you with everything from creating smart lists to advanced campaign management—ensuring your contact segmentation and communications are always optimized for success.
Final Thoughts
By following these steps, you can easily create a smart list on Glue Up and take control of your contact management strategy. For more expert tips and step-by-step guides on managing the Glue Up platform, visit our blog regularly and learn how Squareloom can help streamline your administrative tasks.